
Since the last time I set up RevenueCat, the company released Test Store, a feature that allows you to start building out your subscriptions without having to set anything up in App Store Connect. This has made things a whole lot easier than it used to be.
Creating the Project
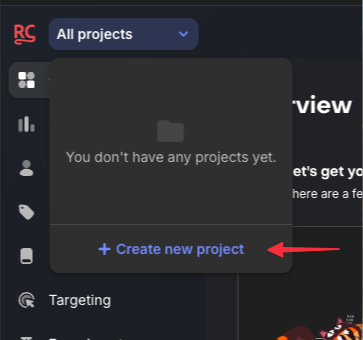
The first thing is to create a new project. On the RevenueCat Home Page, click on the All projects dropdown in the upper left hand corner and click on Create a new project.
 Create a Project
Give your project a name, select the category, and choose the platforms that you want to support.
 Configure the project
Next, you need to configure the products that you wish to sell. You should configure these to be the same offerings that you plan to use in production. The entitlement name should match what you plan to use as the Subscription Group name.
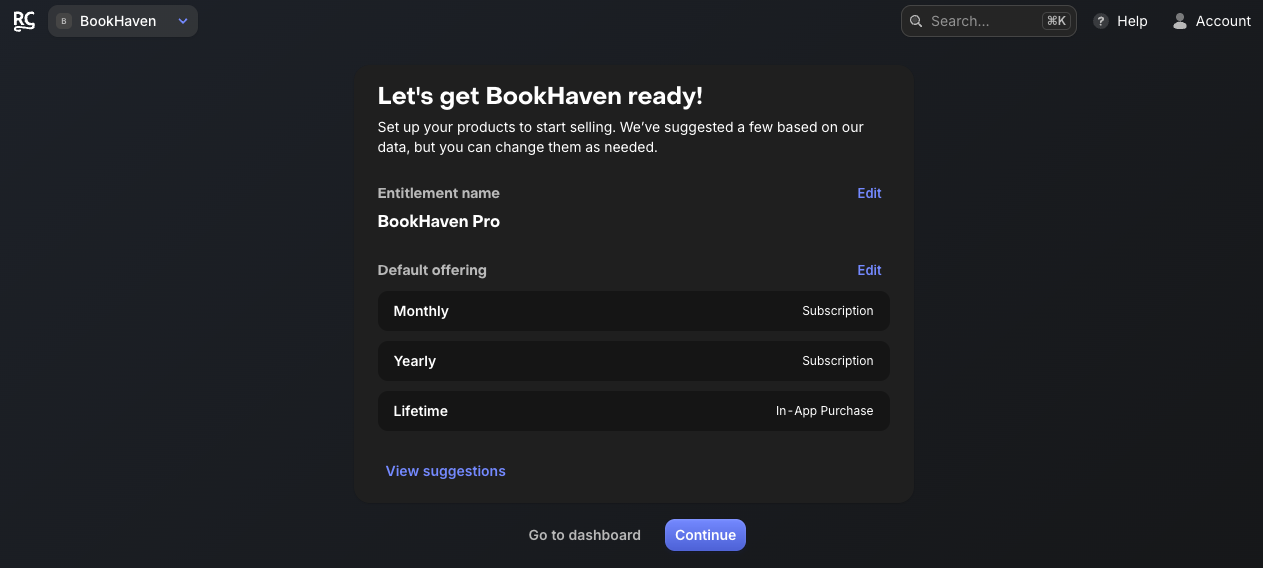 Create Offerings
The final screen provides information on how to install the SDK and provides examples on how to add the information to your app.
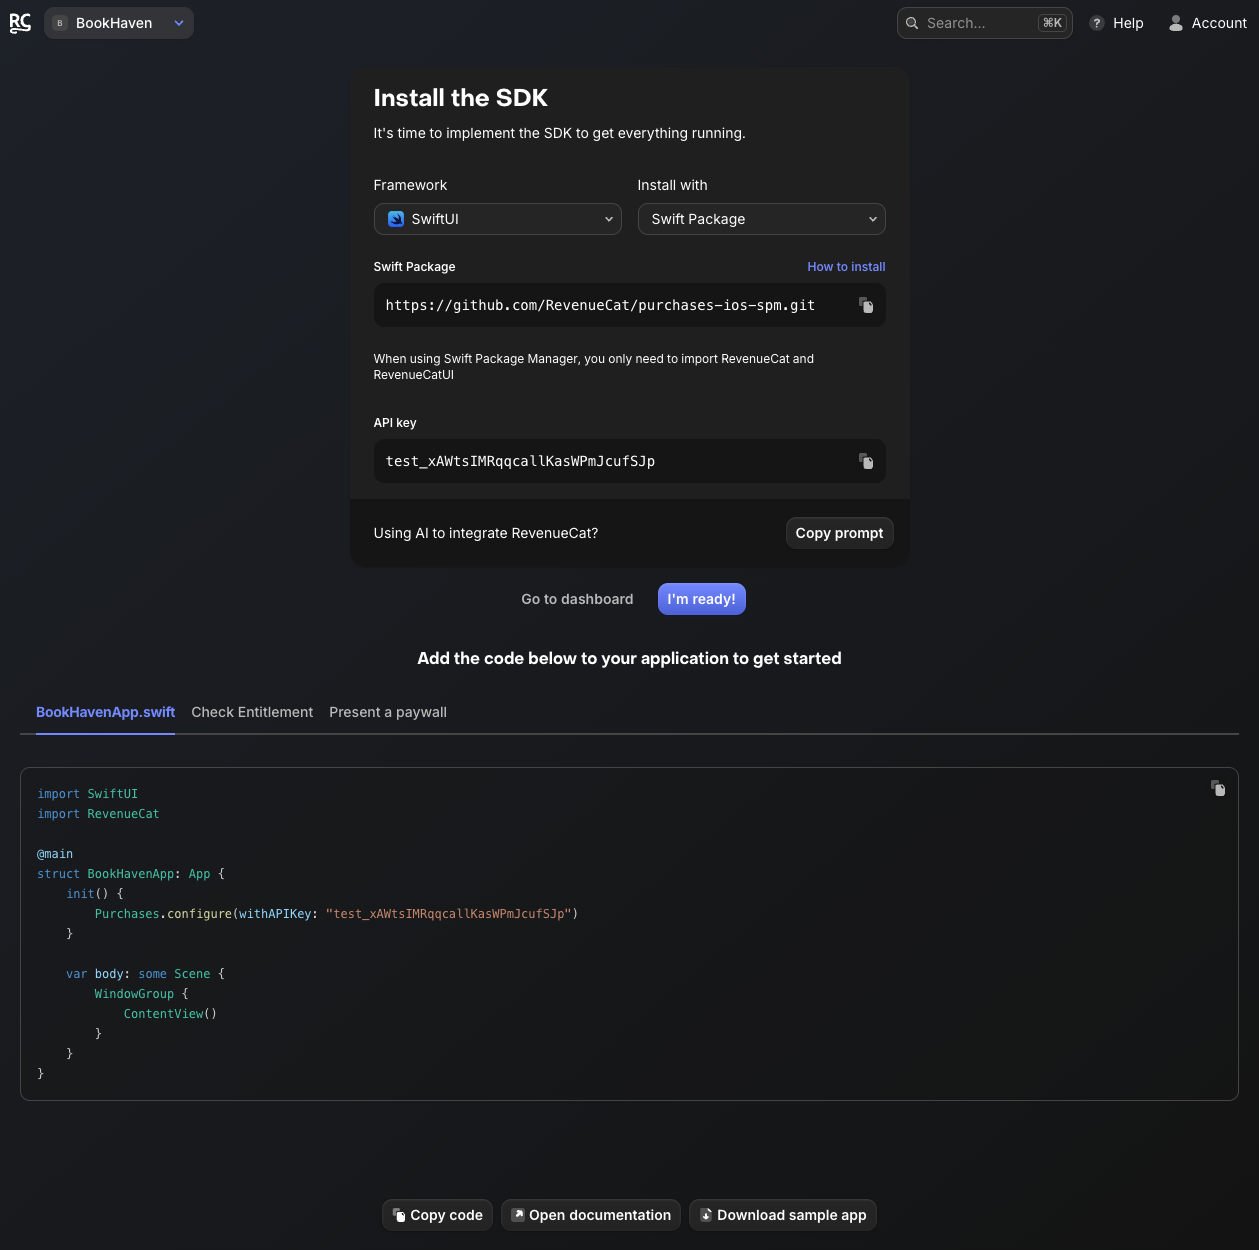 Install the SDK
Create the Paywall
One your application is configured in RevenueCat, the next step is to create the Paywall. You can start by clicking Paywalls in the left side menu and then clicking New paywall. Browse through the templates and fine the one that best suits your app and update it for your app. You can find documentation and a full tutorial on creating a paywall here.
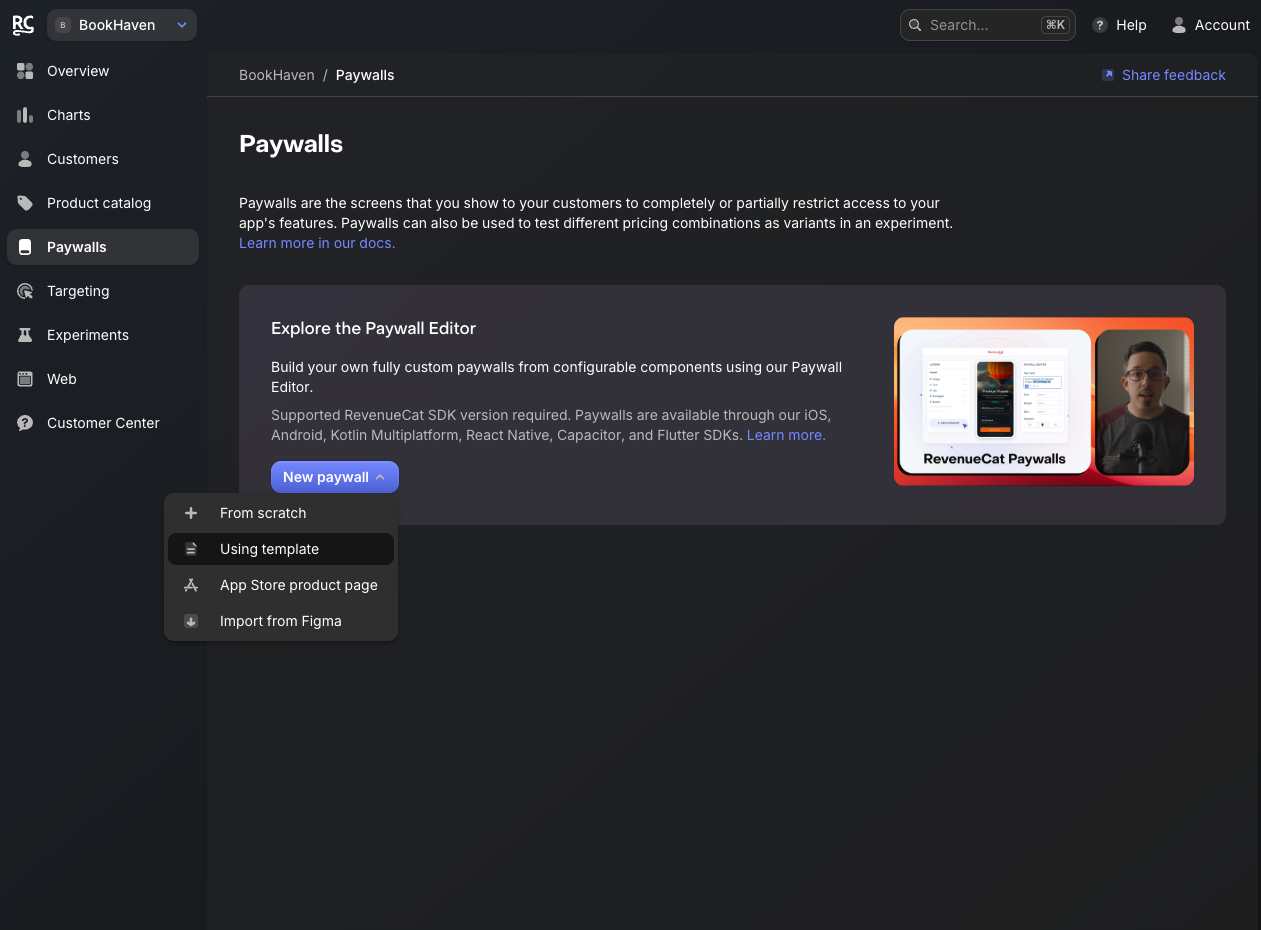 Create the Paywall
Add RevenueCat to your Application
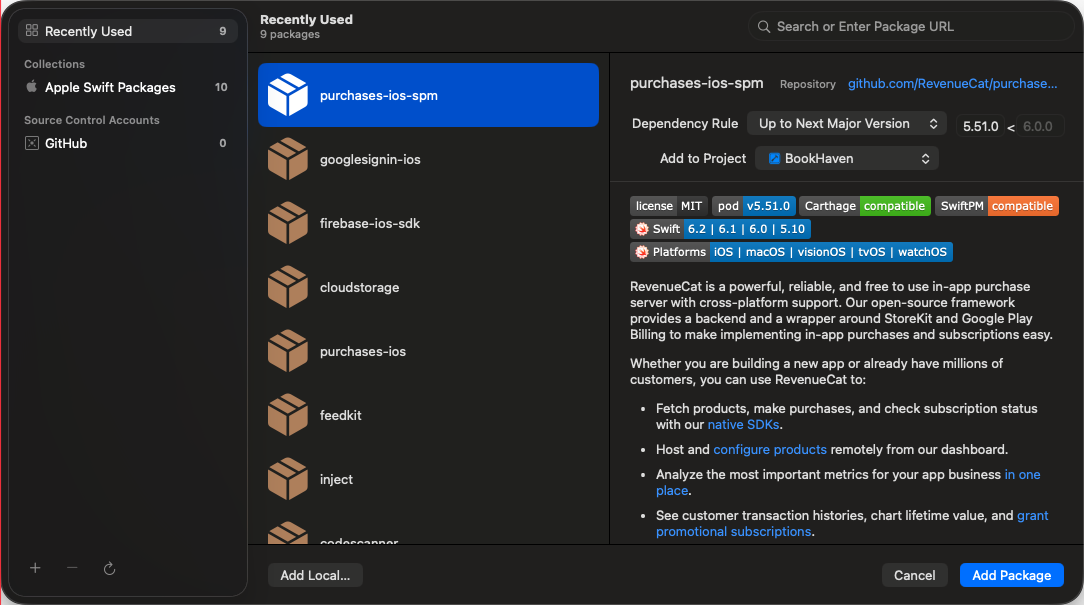
One you have your paywall configured you can easily add it to your application with just a little bit of code. First is to add the RevenueCat package to your project. You can do this by clicking File -> Add Package Dependencies… and pasting the URL https://github.com/RevenueCat/purchases-ios-spm.git in the search box and then clicking Add Package. You need to make sure that you choose to add RevenueCat and RevenueCatUI to your app target.
 Install the SDK
Next, we need to configure the application with the test signing key. Make sure you import RevenueCat to your App file and then add the following:
init() {
    Purchases.configure(withAPIKey: "test_FiDZuWpYGHliuhfGwkAakPANNFqh")
}
The example page gives you a function you can use to check your entitlement, but I prefer to have an entitlement manager that I can reuse throughout the app.
import Foundation
import RevenueCat

@Observable
@MainActor
final class EntitlementManager {
    static let shared = EntitlementManager()

    var hasEntitlement: Bool = false

    private let entitlementID = "BookHaven Pro"  // Update to your entitlement name

    @ObservationIgnored private var updateTask: Task<Void, Never>?

    private init() {
        startListening()
    }

    private func startListening() {
        updateTask = Task { [weak self] in
            guard let self else { return }
            for await customerInfo in Purchases.shared.customerInfoStream {
                let isActive = customerInfo.entitlements[entitlementID]?.isActive == true
                // Updates must happen on the MainActor (guaranteed by @MainActor on the class)
                hasEntitlement = isActive
            }
        }
    }

    // Optional: Manual refresh (e.g., on app foreground or pull-to-refresh)
    func refresh() async {
        do {
            let customerInfo = try await Purchases.shared.customerInfo()
            hasEntitlement = customerInfo.entitlements[entitlementID]?.isActive == true
        } catch {
            print("Error refreshing customer info: \(error)")
        }
    }

    deinit {
        updateTask?.cancel()
    }
}
Now you can use the EntitlementManager on any page where you need to check to see if they are a subscriber by either using it as a singleton
@State private var entitlementManager = EntitlementManager.shared
or by importing it in the App file and using it as an environmental variable
import SwiftUI
import CoreData
import RevenueCat

@main
struct BookHavenApp: App {
    @State private var entitlementManager = EntitlementManager.shared

    let persistenceController = PersistenceController.shared


    var body: some Scene {
        WindowGroup {
            ContentView()
                .environment(\.managedObjectContext, persistenceController.container.viewContext)
                .environment(entitlementManager)
        }
    }

    init() {
        Purchases.configure(withAPIKey: "test_evobQqSGYzDHjBilFPxgtHGjNUd")
    }
}
and importing it on the views that need it
@Environment(EntitlementManager.self) private var entitlementManager
Adding the Paywall
Adding the paywall to your views is as simple as importing the RevenueCatUI and then calling the PaywallView(). My preference is to use it as a sheet and present it whenever somebody clicks on a feature that requires a subscription. You can do this by enclosing your functionality in an if statement.
import SwiftUI
import RevenueCatUI

struct PaywallTest: View {
    @Environment(EntitlementManager.self) private var entitlementManager
    @State private var showPaywall: Bool = false

    var body: some View {
        VStack {
            Text("Subscription Test")

            // Check to see if the user is entitled and if not show the subscribe button
            if !entitlementManager.hasEntitlement {
                Button {
                    showPaywall.toggle()
                } label: {
                    Text("Subscribe")
                }
            } else {
                // Actual application work
            }
        }
        .sheet(isPresented: $showPaywall) {
            PaywallView(displayCloseButton: true)

        }
    }
}

#Preview {
    PaywallTest()
        .environment(EntitlementManager.shared)
}